at long last (with some firsts)
The pieces and parts of this have been quietly tucked in a corner for a long while, mostly waiting for me to summon the courage to move forward. There are many firsts wrapped into this little doll quilt, adding so much extra pressure to such a simple project. At the top of the list is that this will be the first doll quilt I’ve made for a very special girl who will be celebrating her 2nd birthday in just a week – and she ADORES doll blankets.
And then there is a list of my personal struggles and feats… 1) basting with pins instead of needle and thread (I’m a convert, just like that), 2) my first machine quilted anything, 3) my first attempt at stippling (maybe a little too tight, but it went well enough for a first try, especially considering the 2-year-old-to-be was on my lap at times), 4) my first foray into something more akin to a “modern quilt” rather than not, and 5) my first attempt at dredging a design out of my own brain.
My mom’s sewing machine traveled to Alaska with me last fall, and I brought it out for this project. It’s so much nicer than anything I’d ever dream of owning, and I’ve intended to save it for “special” sewing (although I don’t have any idea what is special enough). It came out for this project just because it was equipped with a darning foot and mine wasn’t. I took a deep breath before unzipping the case and studiously read through the paperwork, so as not to tweak anything and for fear of having to imagine my mom cringing. In the end it worked beautifully for me and the only tears I shed were simply from realizing that my mom’s hands played a little role in preparing this gift for her granddaughter – through the machine, and through years of patiently preparing me.
The Specs for Cupid’s Arrow: 21″x21″, assorted green/pink/fuchsia patchwork, pale blush background and backing, bound with Amy Butler Sun Spots in olive, cotton batting
for a girly chef
I know a young girly-girl that loved receiving little gifts from a woman she called “my friend Jan”. Jan was my mom and she gave sparkly, bright, twinkly gifts to her little friend, which I’m sure my mom must have called “pretties”. I was hoping to include a “pretty” in my Christmas package to this young girl, and settled on a chef’s hat since she’s a big helper in the kitchen.
It was hinted that pinks and yellows might be especially appreciated, so I hunted down a pink print with cupcakes, malts, and lollipops spread about. I added a lime-green whisk and some pretty napkins to the package as well, mostly to ensure she’ll know it is a chef’s hat. Not a wonky beret, toque, or tam – but a chef’s hat for a girly-girl.
Curly Pops’ tutorial for a chef’s hat held my hand the whole way, including cooking up the inspiration for the gift (thanks so much). It was relatively simple to make, and I managed it in a quick afternoon with a toddler directing the show. I thought A would slow things down, but she would point at the sewing chair and say “down” every time I stood up. Talk about motivation! It was my first attempt at gathering fabric, which went well enough. I made it adjustable by adding a 3/4″ vertical strip of the “hook” and a 2″ wide patch of “loop” when I applied the hook and loop closure. Hopefully I estimated the circumference correctly. I tried it on A, but she’s still just a wee one.
shhh…
This is the beginning of a little christmas surprise for A. Although her little eyes have watched nearly every stitch so far, I doubt she knows where this is leading. I’m waiting for one or two more perfect pinks to arrive in the mail and then will have all the ingredients I need, and will hopefully finish on time. More to come!
in the (saint) nick of time
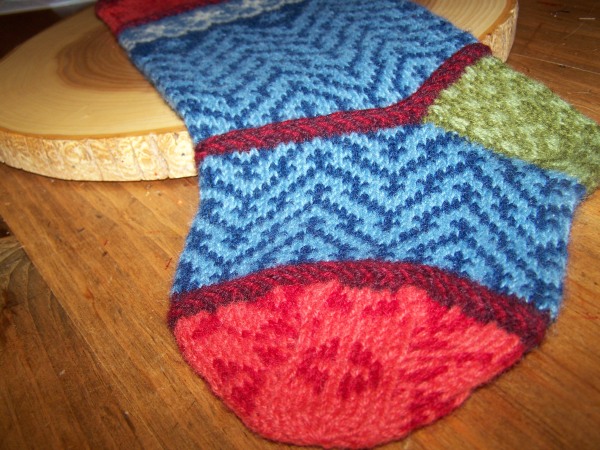
Finished with a little time to spare. Little A may not be aware of Christmas traditions this year, but this is the year she’ll begin making memories that will lead to tradition. I desperately wanted to make sure that A had a Christmas stocking this year, and brought it with me when my family gathered a few months ago, knitting this sock and visiting by our mom’s side just before she passed away. It was good to share those days, but I’ve had a difficult time picking up again.
Christmas is practically knocking on the door, so I bit the bullet and finished today. I’m glad to have it done, and though it makes my eyes well up, I’m so glad it has tender memories attached to it. Details, details? It is the Mark Christmas Stocking kit, following the pattern and with the yarn provided (in other words, no creativity on my part). I really like the burgundy/dark red braid, but did something wrong on the braid near the toe. It looks a little off if you inspect it, but I’m going to leave it be. A little imperfection just makes it all the better in this case!
remote possibilities
Meet A. She was invited to her first kid’s birthday party, with just 24-hours notice. We live in a semi-remote small town in Alaska, so I immediately started scratching my head trying to figure out what was in my house that could be gifted without actually re-gifting. At the same time, I’ve been contemplating picking up needles, thread, yarn, and fabric again. I’ve been digging through the creativity that abounds in the blogging world, drooling and dreaming. But the tyke, the little tyke that is underfoot all the time, has kept my energy elsewhere. It seems like she’s just old enough and I’m finally sleeping just enough to give this an attempt. So here goes!
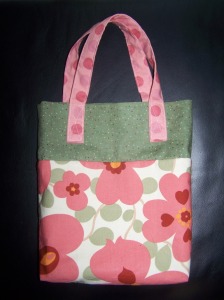
My fabric stash is slim, but I managed to pull together some girly pinks and thought a tote might be just the thing a little girl would need to collect treasures. And hopefully, a simple, easy entry back into stitching with a complete project in one evening. Mission accomplished!
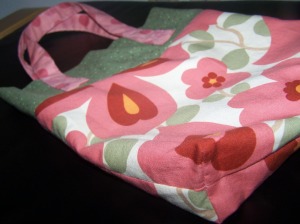
It’s a simple tote, built to fit the arm of a 2-year old. I built the bottom section of the tote with a cream-colored lining and then added a doubled-over green band, so the green actually becomes the upper level of the interior too. Tack a few straps on and done!
I made it just a bit more fancy by adding a box bottom to both the tote and the lining, and then did a crazy French seam to connect the bottom with the green band. I wouldn’t recommend the French seam, but it was the result of not having much of a plan when I started and wanting to have a clean finish on the interior. I’m having such a hard time not giving it to my sweet little A instead of the birthday girl. Hopefully the recipient will wear it dangling from her elbow just as well as A does!


